


Outlook makes it easy to add basic email signatures to all outgoing messages. You will need to create a signature for each individual email address if you are using Microsoft Office 365 in Outlook Web App.
Note: If you are using both Outlook Web Access (OWA) and Outlook 2016, you will need to add an email signature to each.
How to add a signature to Outlook:
- In your web browser, sign to Outlook 365 Web App with your username or email, and enter your password.
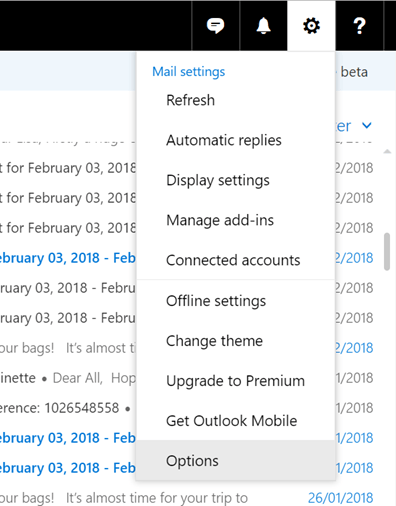
- Click on the ‘settings’ icon in the top right, and click ‘Options’.
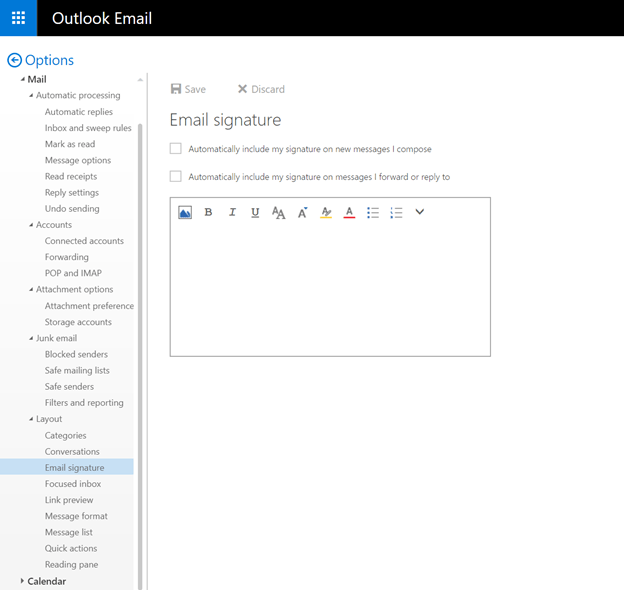
3. On the left side of the navigation page, under ‘Mail Options’, Go to ‘Layout’, then ‘Email Signature’.
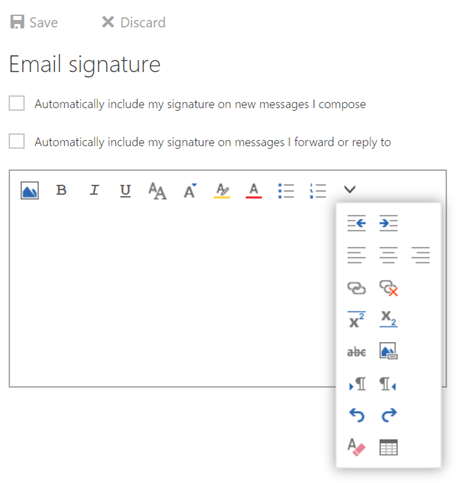
4. Use an image or logo for brand consistency in your external communications through Outlook. Add signature in the text box, and any links and tables you want to include, and change the font, colour and layout.
5. Make sure you look over the check box settings above the email signature design field and decide whether you want to select these.
If you want a signature to appear automatically in the footer of all new email messages, click the first box.
If you want to automatically include your email signatures on all your reply or forwarded emails, click the second box.
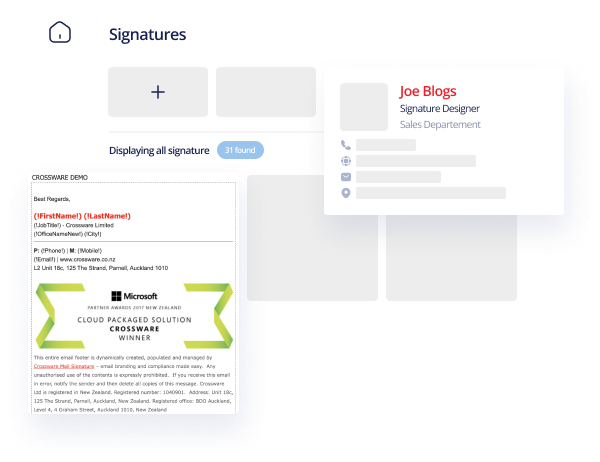
Here’s an example of how a simple email signature in the Outlook Web App can look.
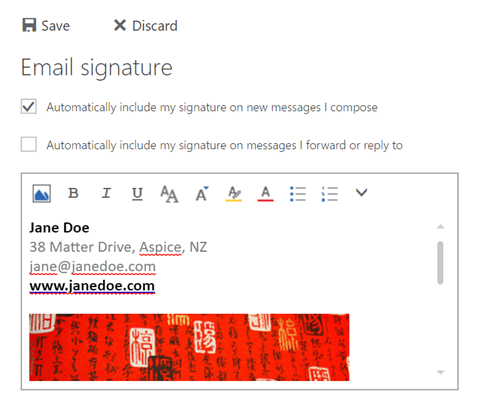
6. Save your settings.
7. If you choose to automatically include your new email signature, it will be applied to all the messages you chose in the new messages / forward / reply messages options.
If you did not select these options, you can manually add your new signature to each future email.
8. To create a new email, click ‘New Mail’ above the folder list
9. At the top of the message click the 3 dots and select ‘Insert Signature’
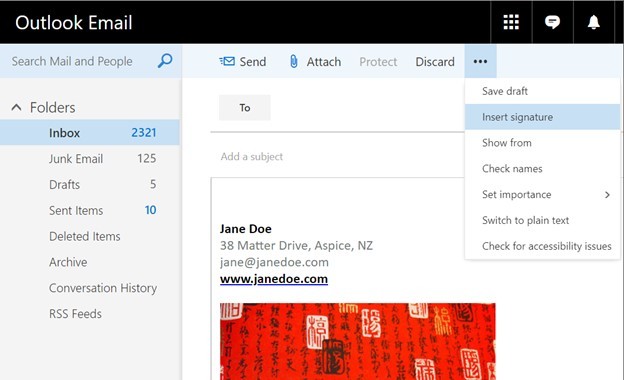
10. For each new email, you will need to add a signature. Outlook will now display your newly created signature, so you can continue formatting your mail, and when you’re ready, click ‘Send’.
How to change the signature in Outlook
To change your signature in the Web App, follow steps 1 to 3 above. Under ‘Email Signature’, select the signature you want to edit and make changes directly into the text box and save your settings.
For additional support, help, or advanced controls such as centralised management of email signatures for your organisation, try out a free trial of CrosswareMail Signature.